Passkeys: How to Protect Your Microsoft and Google Accounts
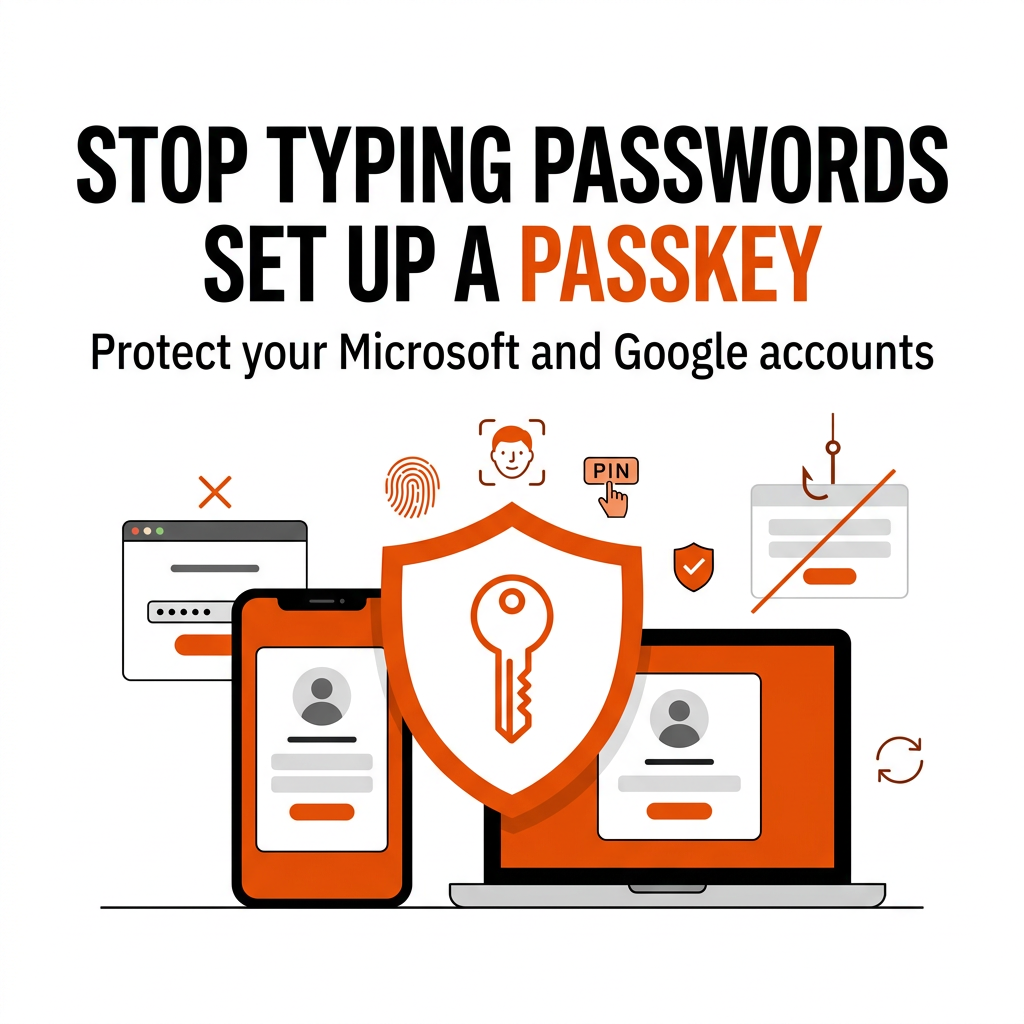
Passkeys provide a simpler and more phishing-resistant way to access Microsoft and Google accounts. Here is how to prepare, create one safely and retain a recovery route.
Passwords are difficult to remember, frequently reused and vulnerable to convincing phishing websites. Passkeys offer a different way to sign in. Instead of entering a reusable password, you approve the sign-in using a trusted device — normally with the same fingerprint, facial recognition or PIN you already use to unlock it.
Microsoft and Google both support passkeys, and creating one may take only a few minutes. However, before relying on one, you should understand where the passkey is stored, which devices can use it and how you will recover your account if a phone, computer or security key is lost. The objective is not simply to remove a password prompt. It is to create a sign-in method that is both safer and manageable.
Last checked: 28 July 2026. Menu names, screens and availability can change as Microsoft and Google update their services — always confirm against the official account-security pages.
What is a passkey?
A passkey is a sign-in credential based on public-key cryptography. When a passkey is created, the service keeps a public key, while the corresponding private credential remains protected by your device or credential manager. Signing in requires your device to approve a cryptographic request — the private credential is never typed into the website or sent to it like a password.
A simple way to think about it
A password is like a secret phrase that you repeatedly give to a website. A passkey is more like the device proving it has the correct digital key without handing that key over.
You normally approve access to the passkey using a fingerprint, facial recognition, a device PIN, the screen lock or a hardware security key. The passkey is associated with a particular website or application, may be stored on one device or synchronised through a supported credential manager, and can reduce reliance on passwords and text-message codes.
Why passkeys resist phishing
Conventional phishing tries to persuade you to enter something — a password, an MFA code, a recovery code or an approval — into a fake website. A passkey is linked to the genuine service for which it was created. A fake website using a similar name or appearance should not be able to request and use the passkey belonging to the genuine service.
The key difference
A convincing fake login page can copy a logo and password box. It cannot simply copy the cryptographic relationship between your passkey and the genuine website.
That does not make phishing impossible. Attackers may still attempt account-recovery fraud, malware, remote-control scams, session-token theft, social engineering, persuading you to add an attacker-controlled sign-in method, or simply stealing an unlocked device. Passkeys do not protect an already unlocked or compromised device.
Passkey, password, PIN and biometrics: what is the difference?
| Term | What it is |
|---|---|
| Password | A reusable secret entered into a service. |
| Device PIN | A code used locally to unlock or authorise the device. |
| Biometric | A fingerprint or facial check used by the device to confirm the authorised user. |
| Passkey | A cryptographic credential protected by the device or credential manager. |
The fingerprint, face or PIN normally unlocks access to the passkey. It is not the passkey itself — and it is not your fingerprint or face being sent anywhere. Biometric information normally remains protected by the device.
Worth remembering
Your face or fingerprint proves to your device that you may use the passkey; it is not sent to every website as a new type of password.
Where passkeys are stored
There are two broad models. A device-bound passkey is stored on a particular computer, phone, tablet, authenticator application or hardware security key — it may need to be registered separately on another device. A synced passkey is stored through a supported credential manager and synchronised securely across your authorised devices.
Depending on what is currently supported for your account and platform, synced passkey providers may include Apple iCloud Keychain, Google Password Manager, Microsoft Password Manager and supported third-party password managers. Not every provider works with every work account or every platform: the service, operating system, browser, account policy and chosen credential manager can all affect what is available.
Before you begin
Before You Begin
- Use a device you own or personally control.
- Protect the device with a strong PIN, password or biometric lock.
- Install current operating-system and browser updates.
- Confirm the account’s recovery email and telephone details.
- Retain another secure sign-in or recovery method.
- Know which credential manager will store the passkey.
- Avoid creating a passkey on a public or shared computer.
- For a work account, check whether your organisation permits passkeys.
- Make sure you know how to remove the device if it is lost.
- Consider registering more than one secure method for important accounts.
Do not create a passkey on a device merely because it is available. Create it only where you are comfortable allowing that device or credential manager to participate in future sign-ins.
Set up a passkey on a personal Microsoft account
At the time of checking, Microsoft’s current process for a personal account works like this — start on the device where you want to create the passkey:
- 1Sign in to your Microsoft account’s Advanced Security Options page (account.live.com/proofs/manage).
- 2Choose “Add a new way to sign in or verify”.
- 3Select “Face, Fingerprint, PIN, or Security Key”.
- 4Follow the instructions shown on your device.
- 5Choose where the passkey will be saved — options may include a password manager (Microsoft Password Manager, Google Password Manager, Apple iCloud Keychain or another synced credential manager), an iPhone, iPad or Android device (via QR code), a physical security key, or your Windows device using Windows Hello.
- 6Approve creation using your device PIN, fingerprint or facial recognition.
- 7Give the credential a meaningful name where the interface allows.
- 8Sign out, then test signing in with the passkey.
- 9Confirm another recovery method remains available.
Check the account type first
Microsoft personal accounts and Microsoft work or school accounts are managed differently. Make sure you are following the instructions for the correct type of account.
Set up a passkey on a Microsoft work or school account
Business accounts are normally managed through Microsoft Entra ID. Whether you can register a passkey — and what type — may depend on your organisation’s authentication policy, administrator configuration, user targeting, the supported passkey providers, your device platform, Microsoft Authenticator configuration, security-key policy and whether a relevant feature remains in preview. Not every user will see the same options.
- 1Sign in to your organisation’s Security info page (normally mysignins.microsoft.com/security-info).
- 2Choose “Add sign-in method”.
- 3Select “Passkey” or “Security key”, using whichever wording is currently displayed.
- 4Choose the storage method your organisation has approved — for example Microsoft Authenticator, a synced passkey provider or a FIDO2 security key.
- 5Complete the device or application setup steps.
- 6Name the passkey where offered.
- 7Test the sign-in.
If the passkey option is absent, contact the organisation’s IT administrator rather than trying to work around the policy.
Set up a passkey on a Google Account
At the time of checking, Google’s current process for a personal Google Account works like this:
- 1Sign in to your Google Account and open the Security section (or go directly to myaccount.google.com/signinoptions/passkeys).
- 2Locate “Passkeys and security keys” under “How you sign in to Google”.
- 3Review whether a passkey has already been created automatically — some Android devices register one for the signed-in Google Account.
- 4Choose “Create a passkey” (or “Use another device” to store it on a phone or FIDO2 security key).
- 5Follow the device prompt.
- 6Approve using your device PIN, fingerprint, face or security key.
- 7Confirm the passkey appears in the account list.
- 8Sign out and test the passkey sign-in.
- 9Retain suitable recovery options.
Google notes that creating a passkey opts you in to a passkey-first sign-in experience, that adding one does not change or remove existing authentication or recovery factors, and that a newly created passkey may take a short period before it is fully trusted at sign-in. Check the existing list before creating a duplicate.
Google Workspace accounts
If your Google account belongs to an employer, school or organisation, Google Workspace administrators may control whether passkeys can be used, whether users can skip passwords at sign-in, two-step verification policy, security-key requirements, account recovery and managed-device access. On a managed account, a passkey may only be usable as a second factor unless the administrator allows passwordless sign-in. Do not assume consumer Google instructions apply unchanged.
Managed accounts
Where an account belongs to an employer, school or organisation, follow that organisation’s authentication policy.
Does a passkey remove the password?
Creating a passkey does not always remove the account password. Depending on the service and account configuration, the password may remain as a fallback, passkey-first sign-in may be enabled, another authentication method may still be available, account recovery may still depend on other verified information, and an administrator may enforce particular methods.
The important point
Adding a safer front door does not automatically remove every older entrance to the account.
After setting up a passkey, it is worth reviewing your password strength, recovery methods, old application passwords, SMS authentication, trusted devices, active sessions and third-party access. Do not delete recovery methods until you have tested the new setup.
What happens if you lose the device?
The correct response depends on where the passkey was stored. A synced passkey may remain available through another authorised device. A device-bound passkey may need to be recreated. Losing a device does not necessarily mean losing the account — and device loss does not automatically expose the passkey, which still requires the device to be unlocked.
- 1Use another trusted sign-in or recovery method.
- 2Locate the lost-device feature where available.
- 3Remotely lock or erase the device where appropriate.
- 4Review account activity.
- 5Remove the lost device from the account.
- 6Remove the associated passkey where appropriate.
- 7Revoke suspicious sessions.
- 8Change the account password if compromise is suspected.
- 9For a business account, notify the organisation’s IT team immediately.
- 10Register a replacement passkey.
How to review and remove passkeys
Microsoft
- Personal accounts: review sign-in methods on the Microsoft account Advanced Security Options page and remove entries you no longer recognise or use.
- Work or school accounts: review the Security info page for your organisation account.
- Windows: passkeys saved to the device can be managed in Windows Settings under accounts and passkey settings.
- Credential managers: review the passkey list inside whichever password manager stores them.
- Review the passkeys listed in your Google Account’s “Passkeys and security keys” section.
- Check for automatically created Android passkeys against devices you no longer use.
- Review passkeys stored in Google Password Manager.
- Check physical security keys registered to the account.
Remove devices you no longer own, passkeys created accidentally on shared devices, old or unrecognised passkeys, credentials belonging to former phones and obsolete hardware security keys.
Half the job
Creating passkeys is only half the job. The list should remain understandable and current.
Common passkey mistakes
- Creating one on a shared device — someone who can unlock that device may be able to attempt account sign-in.
- Forgetting account recovery — a secure sign-in method still needs a recovery plan.
- Not knowing where it was saved — know whether the credential is on the local device, a phone, an authenticator, a security key or a synced password manager.
- Assuming biometrics are sent to the website — the biometric normally remains protected by the local device.
- Removing old methods too early — test the passkey before changing fallback or recovery methods.
- Ignoring business policy — a personal credential manager may not be appropriate for an organisational account.
- Leaving old passkeys registered — old devices and credentials should be reviewed and removed.
- Approving an unexpected registration request — do not create or approve a passkey because an unsolicited caller, email or pop-up instructs you to do so.
Passkey safety checklist
Set Up Passkeys Safely
- The device belongs to me or is securely assigned to me.
- The device has a strong screen lock.
- The operating system is supported and updated.
- I know where the passkey will be stored.
- I have checked my recovery details.
- I have another secure way to recover the account.
- I have not created the passkey on a public or shared device.
- I have tested passkey sign-in.
- I understand whether the password remains active.
- I know how to remove the passkey.
- Important accounts have more than one safe recovery route.
- Old devices and passkeys have been reviewed.
- Work-account passkeys comply with organisational policy.
Practical business implications
Passkeys require a rollout plan
- Which users should receive passkeys
- Which passkey types are permitted
- Whether synced passkeys are allowed
- Whether personal credential managers are acceptable
- Whether security keys are required
- How administrators are protected
- How users register
- How support will be provided
- How lost devices are handled
- How leavers are managed
- What fallback methods remain available
Helpdesk processes must change
Support staff should be able to distinguish between a forgotten device PIN, a lost phone, a removed passkey, a failed biometric, an unavailable credential manager, account recovery, a blocked authentication policy and registration on the wrong device profile — because each needs a different response.
Recovery may become the weak point
As sign-in becomes harder to phish, attackers may focus on helpdesk impersonation, recovery email accounts, telephone numbers, social-engineering administrators and adding a new authentication method to a compromised account.
The uncomfortable truth
Stronger sign-in makes secure recovery more important, not less important.
Questions to Ask Your IT Provider
- 1Are passkeys enabled for our Microsoft or Google business accounts?
- 2Which types of passkey do we permit?
- 3Can staff use personal password managers for business credentials?
- 4Are administrator accounts required to use phishing-resistant authentication?
- 5What happens when an employee loses a device?
- 6How are passkeys removed when someone leaves?
- 7Which fallback methods remain enabled?
- 8How is identity verified during account recovery?
- 9Are SMS and voice authentication still in use?
- 10Can users register passkeys without administrator approval?
- 11Do we maintain emergency-access accounts?
- 12How are authentication methods reviewed?
- 13Are passkeys supported on all managed devices?
- 14What assistance is available during registration?
- 15Can we identify users who have not registered a phishing-resistant method?
The IT Club View
Passkeys are one of the few security improvements that can make an account both safer and easier to use. People do not need to invent another complex password, remember it or type it into a website. The device proves that it holds the correct credential, and the user approves the request in a familiar way.
However, ease of use should not lead to careless registration. The user still needs to know which device holds the credential, whether it synchronises, how to recover the account, what happens when the device is replaced and whether the account belongs to an organisation.
The goal
A passkey should remove the password problem—not create a device-recovery problem.
Businesses should avoid presenting passkeys as an isolated user setting. They should form part of identity policy, device management, administrator protection, account recovery, joiner and leaver processes, support procedures and regular access reviews. The best passkey deployment is one that users can understand, support teams can recover and administrators can verify.
For the organisational side of this change — Microsoft’s move to make passkeys the default and the retirement of its SMS and voice authentication — see our companion analysis:
Microsoft Is Making Passkeys the Default: Is Your Business Ready? →
The Operational Heartbeat
Authentication methods change as staff join and leave, phones are replaced, laptops are rebuilt, credential managers change, security keys are lost, administrators change, users add new methods and platform features evolve. A recurring review should check users registered for passkeys, administrator authentication, users relying on SMS or voice, old and unused authentication methods, lost or replaced devices, leaver credentials, emergency-access accounts, recovery information, failed registration patterns, unsupported devices, authentication-policy changes, security-key inventory and sign-in anomalies.
Passkeys need an operational heartbeat: registrations, lost devices, fallback methods and administrator access should be reviewed rather than assumed to remain secure.
Administrator Technical Note
Practical deployment guidance for administrators rolling out passkeys across Microsoft Entra ID and Google Workspace.
Microsoft Entra ID
- Configure the Authentication Methods Policy for passkeys (FIDO2), covering both synced and device-bound passkeys where supported.
- Decide whether to enable Microsoft Authenticator passkeys, passkeys stored in Windows and FIDO2 security keys.
- Target eligible users and groups deliberately rather than enabling everything for everyone.
- Use a registration campaign to nudge users towards phishing-resistant methods.
- Use a Temporary Access Pass where appropriate for first-time registration and recovery.
- Apply Conditional Access and authentication strengths to require phishing-resistant authentication for administrator accounts.
- Review attestation policy and the allowed passkey providers (AAGUIDs) where the organisation restricts credential types.
- Monitor registration and sign-in logs for failures and unexpected method additions.
- Document recovery and revocation procedures, and maintain tested break-glass accounts.
- Check current documentation for unsupported or preview features and device and browser compatibility — do not treat preview capabilities as generally available.
Google Workspace
- Review administrator passkey settings and the 2-Step Verification policy.
- Decide whether to allow users to skip passwords at sign-in (passwordless or passkey-first options).
- Apply security-key controls for administrators and high-risk roles.
- Plan user enrolment, including managed devices and unmanaged personal devices.
- Review account-recovery settings and administrator-account protection.
- Use login audit information to monitor authentication events.
- Document lost-device response and the leaver process.
- Use organisational-unit or group targeting where supported to stage the rollout.
Staged deployment
- 1Discover — identify current authentication methods, devices, account types and recovery dependencies.
- 2Design — choose permitted passkey types and credential providers.
- 3Pilot — begin with IT staff and a small representative user group.
- 4Protect administrators — move privileged accounts to phishing-resistant methods early.
- 5Prepare recovery — document lost-device, replacement-device and account-recovery processes.
- 6Communicate — explain what a passkey is, where it is stored and what users should never approve.
- 7Deploy — roll out in controlled groups.
- 8Verify — check registration, successful sign-in and retained recovery options.
- 9Reduce legacy methods — only after testing, evaluate whether weaker methods can be restricted.
- 10Monitor — review authentication methods, failures, recovery events and dormant credentials.
Do not disable existing authentication or recovery methods across the organisation until passkey registration, support processes and emergency access have been tested.
Ready to set up a passkey?
Use our step-by-step Passkey Setup Guide for Microsoft and Google accounts, including preparation, recovery and lost-device checks.
This article provides general technology information based on Microsoft and Google documentation available at the time of checking. It is not security, legal or professional advice, and interface details may change.
Plain-English Takeaway
A passkey lets your trusted device prove who you are without sending a reusable password to the website. It is easier to use and more resistant to phishing, but it should be created only on a device you control. Check your recovery information, test the new sign-in and remove passkeys belonging to devices you no longer use.
Need the practical steps?
A short, instruction-led version of this topic is available in the Knowledge Centre.
View the Knowledge Centre GuideRelated Articles
Cyber Insurance: What Does It Really Protect?
Cyber insurance can support a business following a cyber incident, but policies, exclusions and security requirements vary. Here is what to check before buying or renewing.
Read articleThe UK Cyber Security and Resilience Bill: Could It Affect Your Business?
The proposed Cyber Security and Resilience Bill would strengthen UK cyber rules and bring more technology suppliers into scope. Here is what SMEs should review now.
Read articleMicrosoft Is Making Passkeys the Default: Is Your Business Ready?
Microsoft is making passkeys the default Entra authentication experience. Learn what this means for MFA, SMS authentication and business security.
Read article